

Recording audio into Audacity
Free software for recording and editing

Skip down to the Using Audacity section for a quick guide.
Despite being free software, Audacity is still the first choice for many podcasters. It is often used in podcast studios (like the one we have in SCAPVC). I use it to record audio, as it offers good tools for managing mic inputs and monitoring recording, and has always been entirely reliable.
There’s a good range of audio recording and editing applications. Mac users have the free Garage Band, which includes a podcast production feature. Adobe Creative Cloud (£££) has its much more sophisticated Audition. I find that these tools are too complicated for me (I have a complicated life, so simple is better).
For mobile recording, on the iPhone and iPad we can use Voice Memo. Android phones have voice recorders from Google, Samsung and others. They are fine, but are limited to two mic inputs (for example with a DJI receiver), and I feel a bit nervous using a phone app for something so important.
For recording indoors I use Audacity on my MacBook with bluetooth lapel mics. This is a bit awkward when walking around exhibits, as I have to carefully hold a £2500 MacBook in my left arm. But it works well.
However, I now don’t usually use Audacity for editing, except maybe “topping and tailing” the start and end of a recording. Instead I use the Adobe Podcast Studio (online tool). Riverside is another good online tool.
Using Audacity
This is the same for Windows and Mac.
Audacity has a slightly odd interface, with the location of tools split between the menus at the top, a Word-style ribbon of buttons and sliders, and various other locations around the window. For recording we will use very little of this.
1. Configuring Mics
Read my article about using bluetooth lapel mics here.
1.1 Detect and select mics
Use Audio Setup > Recording Devices to choose a mic. If you have plugged mics in after starting Audacity they may not appear. Use the Rescan Audio Devices option to fix this.
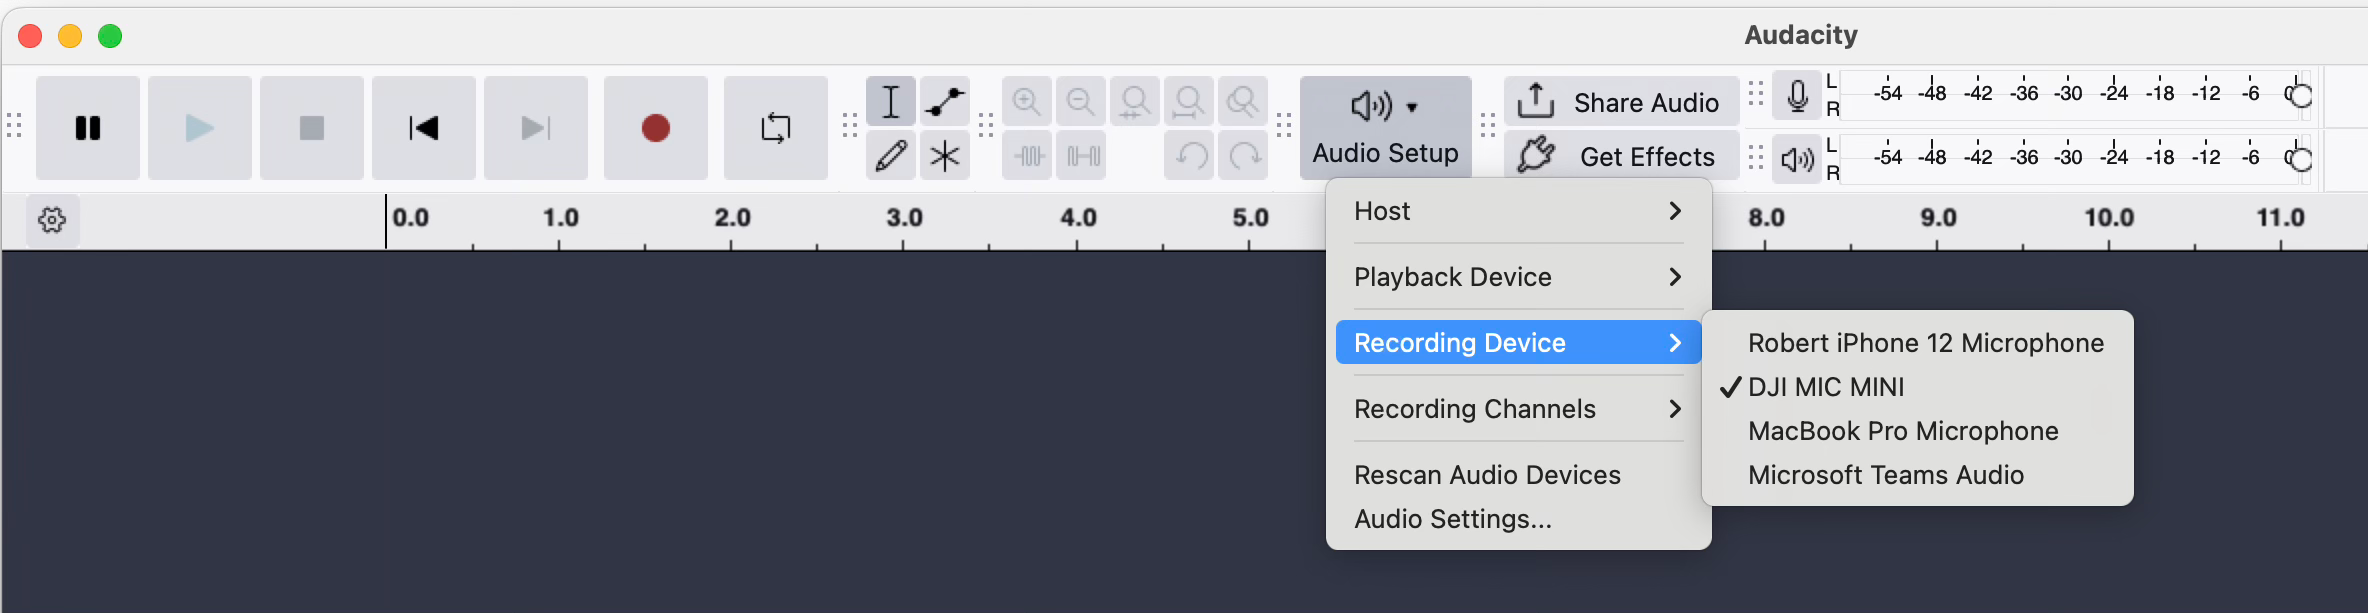
When using bluetooth mics with a receiver plugged into the computer (e.g. DJI) sometimes the mics still don’t appear. This is usually caused by the mics not having correctly connected to the receiver (in the case of DJI, put the kit back in the charging case, and start again).
If you are using a Mac and have your iPhone nearby you will notice that the iPhone can be used as a mic. As iPhones have good sound recording, this can be a good solution if you don’t have good bluetooth mics.
1.2 Test recording and adjusting input volume
Although it is possible to listen to the audio through headphones while recording (live monitoring), I prefer to do test recordings and listen back.
Note that if you don’t get sound through your headphones, they might need to be set as a Playback Device using the Audio Setup menu. And if you can’t find your headphones on there, then Rescan Audio Devices.
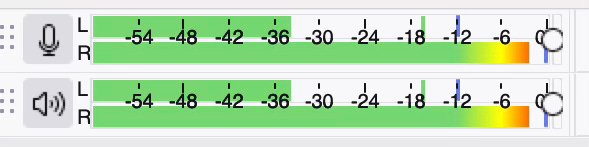
The recording level is shown by the green in the monitor. If you see it peak into the red, use the slider on Mic bar to reduce sound level. This shows the right hand side of a stereo input (from two mics) is too loud:
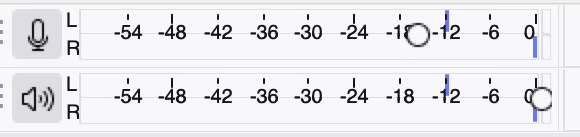
This shows the slider dragged down to about minus 12.6:
Record, test, adjust until you get a comfortable level. Note that some people will get louder as they get into a conversation - try to predict this!
2. Mono or Stereo?
If you are using a pair of mics, you get the option to record each onto a different channel. That allows us to adjust the sound level of each input. You can also adjust the panning in the mix, so that one voice is slightly to the left and another slightly to the right. This is more comfortable for the listener than having them completely separated.

Next, add two mono tracks using the Tracks > Add New > Mono Track menu option twice. This will record each mic onto a separate track.
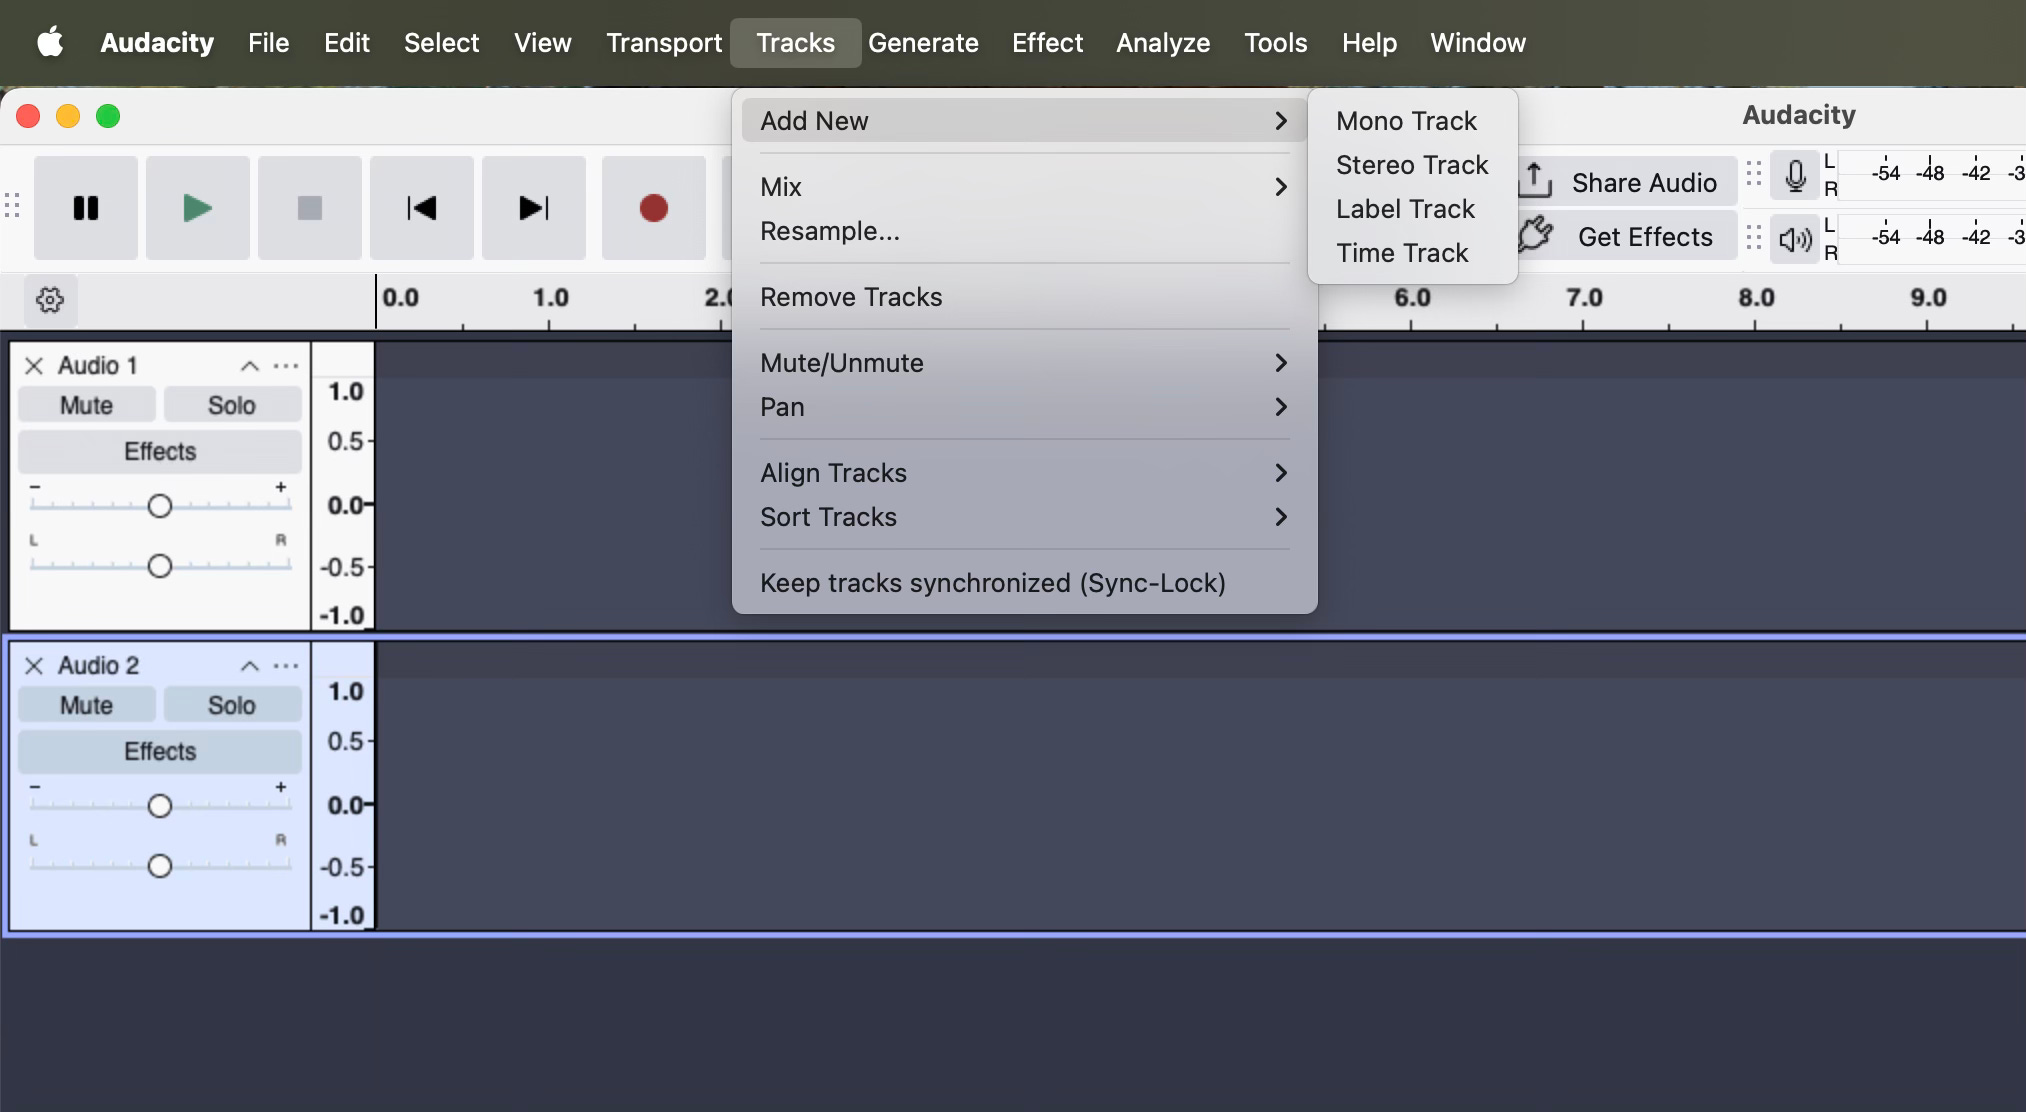
After recording we can adjust the panning using the L / R slider on each track. We can also adjust the volume of each mic separately using the - / + sliders.
3. Editing
We will not go into much detail here, as the plan is to use Audacity mainly for recording, and then edit in Adobe Podcast Studio.
Your tracks will shown going horizontally left to right. You can move them to the right a bit, and add in further audio. You might use that to add some music.
3.1 Cutting
Simply drag the cursor across the part of the track that you want to delete. If editing a pair of stereo tracks, make sure you drag across both tracks to select the same section from each. I start from the bottom and drag upwards.
Press play to listen to it and check you have the right section.
Then press delete (Windows) or backspace (Mac).
3.2 Splitting clips
You might want to do this so that you can add some space and paste in a different part of the recording, or add a new recording.
To split a clip, click on it at the point you want to do the split, so that a line goes across it. If you have stereo tracks or more, press CMD (Mac) or CTRL (Win) as you are doing this, and then click on each track in turn. Then in the menu Edit > Audio Clips > Split.
4. Export the audio file
Use File > Export Audio (in the menus at the top of the Audacity window).
You get a choice of saving the file into the audio.com cloud storage, or onto your computer. I use the latter.
Then before pressing the Export button you can choose audio file type and settings. I just leave this at the defaults: MP3 format, 44100Hz, quality Standard 170-210kbps.